Sunday, August 31, 2014

Woes of cleaning and modding...

So, first thing's first. I was refurbishing the Master System the other night, putting it up for sale. I never took notice that the logo got faded on the console, so that was a little depressing. Another depressing thing? After getting the Master System all together after cleaning, the reset and pause button didn't work. The button membrane part worked perfectly, but with the case on, it didn't.

Thinking I needed to give it a wider footprint when pressing the button down, I came up with this solution.

Thumb tacks to get the wider footprint needed to get that button down.

The shaft, for some reason, was not pushing the pause and reset buttons perfectly. I filed down the shafts (just mere millimeters) so the thumb tack would sit just on the membrane of the button. Buuuuut, I goofed on this move.

I boneheadedly super glued the thumb tacks to the shafts of the button...before I got them in the case! Dummy!

Broke the thumb tacks off, cleaned up the glue, and then did it properly.

Now, got the case all put back together, works just fine. So problem solved and put on the market.

Figure I had some time, so I went and installed a EPROM for a multi region BIOS for my Sega CDs. I did the Model 1 first, since it was already socketed. 

Original BIOS removed from the Model 1 SCD. Yay, sockets!

If it's not obvious, the top one is the burned EPROM I got in a trade for my old N64, the bottom one is the OG BIOS.

Seated in and ready to go.

...Sort of. After getting it installed, I tested it out. Turned on the Genesis...nothing. Just a little light activity from the SCD, nothing else. 

...

Maybe the guy who burned them for me mismarked them (I asked him to make one for my Model 2 SCD, too). So I installed that one in...nothing also.

...

At this point, I thought I messed something up during the rebuild of the SCD. I put the original BIOS in...booted up just fine. 

...

I let the guy who burned the EPROMs for me know my situation. He said that he has more EPROMs on order and he'll get them properly tested for me pretty soon.

Meh...

Thursday, August 28, 2014

Twin Famicom revisited...

So my son has been loving watching me play some old NES games on my Twin Fami. He's like his dad; getting into Teenage Mutant Ninja Turtles. I was playing the original TMNT on the Twin. I've noticed that the sound was really low. Kinda annoying.

I remember a while back reading about the sound difference in the Twin by removing one filtering capacitor in there. This is that link.

Well, I decided to try it tonight.

Capacitor C205 was removed. Easily done with my small wire cutter.

The capacitor. The value of the cap was 0.022µF ceramic or tantalum, for my reference.

The result? Didn't sound too loud playing Akumajou Densetsu (Japanese version of Castlevania III), but other games sounded much louder. The disk games sounded louder as well.

Did it need to be done? No. I was just curious on how much of a difference it would make. Pretty decent diff, if you ask me. I've already asked a forum member about removing the cap. He's mentioned that his console didn't suffer any long term ill effects, so that's a good thing.

Wednesday, August 27, 2014

Eww, ewww, EWWWW!

So, I know that the Master System I got from a friend of mine was hanging out in storage since lord knows when. But, WOW!

I didn't get images of the initial opening of the console, but trust me. It was filthy. Dirt and dust balls all over. The cart slot was filled with dust balls. Grime all over the case.

I did manage to sweep up the board like I usually do (soft bristle paintbrush and usually a can of compressed air, but this time around I was just blowing real hard on it). Got it to a decent state. All the components looked fine (no blown caps, solder joints still solid), just a little patina on the edge of the board.

I managed to power the board up while I get the case cleaned, everything worked fine.

The controllers though...I'll let the pictures tell the tale.

...this was even before I opened it...

Cracked open. See that crust on the outer edge of the controller casing? Yeah, he played his games HARD!

The controller's PCB...what's that on the fire buttons?

@_@ I don't know what that stuff is, but DAMN!

Crusteriffic! No, not really.

After some scrubbing with Weiman's glass-top range cleaner and clean up with alcohol:
Nice, huh?

I also got a Light Phaser with the deal:
I also stripped this puppy down and cleaned up. It was also caked with dirt, but it was manageable. 

So all there is now is to wait until the dishwasher is done and the case to dry. I washed the membranes for the controllers by hand, but ended up ripping one slightly being too aggressive on it. I hope it still works fine.

The hope is to trade this Master System, which ended up being a model 1 :(, and trade it for a clean model 2. I hope I can get this happening.

Monday, August 25, 2014

Just to get things on my table clear...

...no, literally clear. I had no room to do other mods.

I mentioned that I took apart a wireless joystick couple of days ago. Well, I got around to cleaning up all the sticker goop from the control panel as well as getting the buttons and main plastic case washed up.

Here's the pics of the temp rebuild.

Buttons and joystick removed from the controller. At this point, the buttons were cleaned and tested, although I am planning on swapping out the buttons for Sanwa ones. The joystick wasn't cleaned yet. Again, might be swapping that out.

Sticker goop gone and panel scrubbed clean.

Side by side comparison. I left the one on the right stock just because I wanted a wireless controller for my 360. Here, the one I stripped down, I placed the joystick and the buttons back in the control panel.

Several PCBs from the stick that I may/may not be using.

I also managed to get the Master System from another friend. I'm gonna have to get it clean, though. I just started cleaning up some of the games that he had with the lot. Pics to follow when I get around to it.

Sunday, August 24, 2014

Finally got around doing something...

I mentioned a while back that I found a 1001 Playstation when I went home to visit family. I also mentioned that the laser was bad on it and I was gonna swap it out with a PSOne's laser assembly.

Well, I finally found a PSOne that I could raid the laser from. So, for the hell of it, I did the swap.

I really didn't take pics of the work because it was just a little swappy-swap. I just had to do some modification to the dust cover of the 1001's laser assembly to fit the PSOne's assembly.

Anyway, got it all put in and ready to go. Powered up the newly fixed 1001...nothing. The spindle barely spins.

I put the 1001's old assembly back in the PSOne. For giggles, I powered up the PSOne with the old assembly in it...works fine.

...

I remember I had a tutorial about laser fixes that I got from MMMONKEY a while ago. I took a gander at it and did the laser adjustments suggested in the tutorial. My multimeter isn't the best (voltage measurements were off by .4 or so volts), so I did the best I could with what I had.

After a few minutes, I got the disc to spin faster and get a better read on it.

Took it to my game area (read: my garage) to test. First with a CD: read fine. Next with a game: Took some time, but it finally read and had no problem keeping up, especially with CDDA.

I MAY go back in to get a better bead on it, possibly with better equipment...or at least properly calibrated stuff.

Another joystick splayed out...

Since I wrapped up my friend's PS3 joystick, I though I'd move on to my other OTHER project.

I got 2 wireless HORI sticks from the same friend as payment for repairing his stick. Both are for the 360. I know that one works fine, the other one I didn't test since it had corroded battery terminals. I figured that this was the one that I'd strip down and become a multi console joystick.

I'm planning on using either an MC Cthulhu or a PS360+ if they ever get back in stock.

Friday, August 22, 2014

Ah damn...

Well, I got in touch with the creator of the Imp. Turns out that the 1st revisions sucked (power draw issues). So, I sent a text to my friend about it. Thankfully, He only cares about the PS3 part since his 360 is gone and he doesn't care about it anymore.

Well, there went a bunch of wiring for nothing. LOL! Whatever. At least I don't have to rack my head around it anymore. I just hope I didn't mess up the USB cable with all that soldering.

Back to stock. :(

Thursday, August 21, 2014

AHHHH! SNAG!

I've hit a snag. I was able to connect some stuff to the controller tonight. I managed to just get the Left and Right connected from the fightpad to the stick, as well as one button and start.

I was gonna test with SF4 since I have that in my 360 now. Per directions, I pressed down the Home button and plugged in the USB cable to the 360. That seemed to turn on the fightpad and finally connect. I tested the directions I had connected and the button; they worked fine. I finally selected my profile on the 360, then it loaded...then reset.

...

then it reset

...

and again

...

and again

...

SNAG!

I emailed the creator of the Imp hoping to get more information. For now, I'm taking a rest from this.

Small progress...

Managed to get wires all added for the 360 fightpad. It's not in my nature to use the same color wires for projects like this, but I had a giant spool of wire that I have no idea why I wasn't using.

I'm exhausted tonight. More so than usual. So all I got done was getting the wires soldered in place for the buttons and joystick. Still need to get USB, guide, and ground wired up on the stick, then all the soldering to the fightpad.

This is the progress so far...


Monday, August 18, 2014

Soldering and loathing...

This wouldn't have been the first time where I almost/did remove solder pads because I suck at desoldering, but it almost happened on the Imp. I was desoldering it to make way for 360 testing. I figured while I was taking the wiring for the PS3 out, I'd just remove the USB connection and clean up the solder pads on the Imp.

The wires were stranded, so I could tell that they were not twisted and tinned like most modders would do. This meant time trying to remove every strand of wire stuck to what little solder is there. I left the heat on too long, so that ruined the pad. I did some multimeter checks for connections. Thankfully, they were still there.

I also managed to clean up the USB solder pads on the 360 PCB. That went a little better, but there was still strands of wire stuck. I think I got most of them out already.

Really exhausted from work and a hellish weekend. Now that I have it all cleaned, I should be able to get wiring done for the buttons, joystick, and guide button on the stick itself and get it ready for testing all tomorrow.

Saturday, August 16, 2014

Joystick priority #1...

So I got around to whipping the soldering iron out and work on the joystick. I desoldered the 360 fight pad that was hacked in there and tried attempted to straight wire the PS3 controller (at least) to the imp. I managed to get it to work, but the PS3 kept giving me a "Maximum Voltage" warning for the joystick, then it would shut off. This only happened intermittently.

It may/may not have to do with how the home button was wired initially. Currently, the guide/home button is wired to the front of the board, where the buttons are. There might be a slight contact issue there, so I may have to migrate that wire to the back of the board.

Well, I did manage to make progress, albeit a little.

The connector for the joystick seems to be a little loose, I have to figure out a way to get that connection tighter. A little bit of bending of the connectors should help a bit...Or I might just dab some hot glue to make it stay.

Anyway, here's some pics of the fightstick when I first cracked it open.

I actually removed that black wire strip from it's confines before I took the pic. Seriously, who doesn't secure PCBs down before closing up? I'm amazed that this thing didn't short out at all!

Close up of the 360 fight pad. I don't mind using CAT5 cable wires for this; again, this is a mess. I'm gonna do something about that...later.

The Imp v1. Again, floating PCB. Big no-no, especially with a metal base.

And now, for it's current state.

With the 360 fight pad removed. At this point I lost the little Home button and spent most of my night looking for it. It was working fine, except for the max voltage warning.

Fightpad removed from the fightstick. I also removed all the wires connecting to the pads on the controller as well as the 2 shoulder buttons that was still on there. 

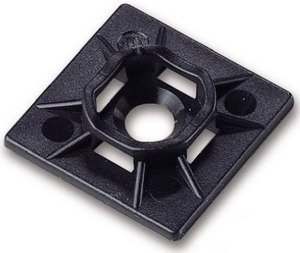
I was planning on securing the fightpad PCB to the metal backing of the controller (foam pad on the PCB to prevent shorts, I'm not a n00b) by bolting it, but I think a zip tie holder like this:
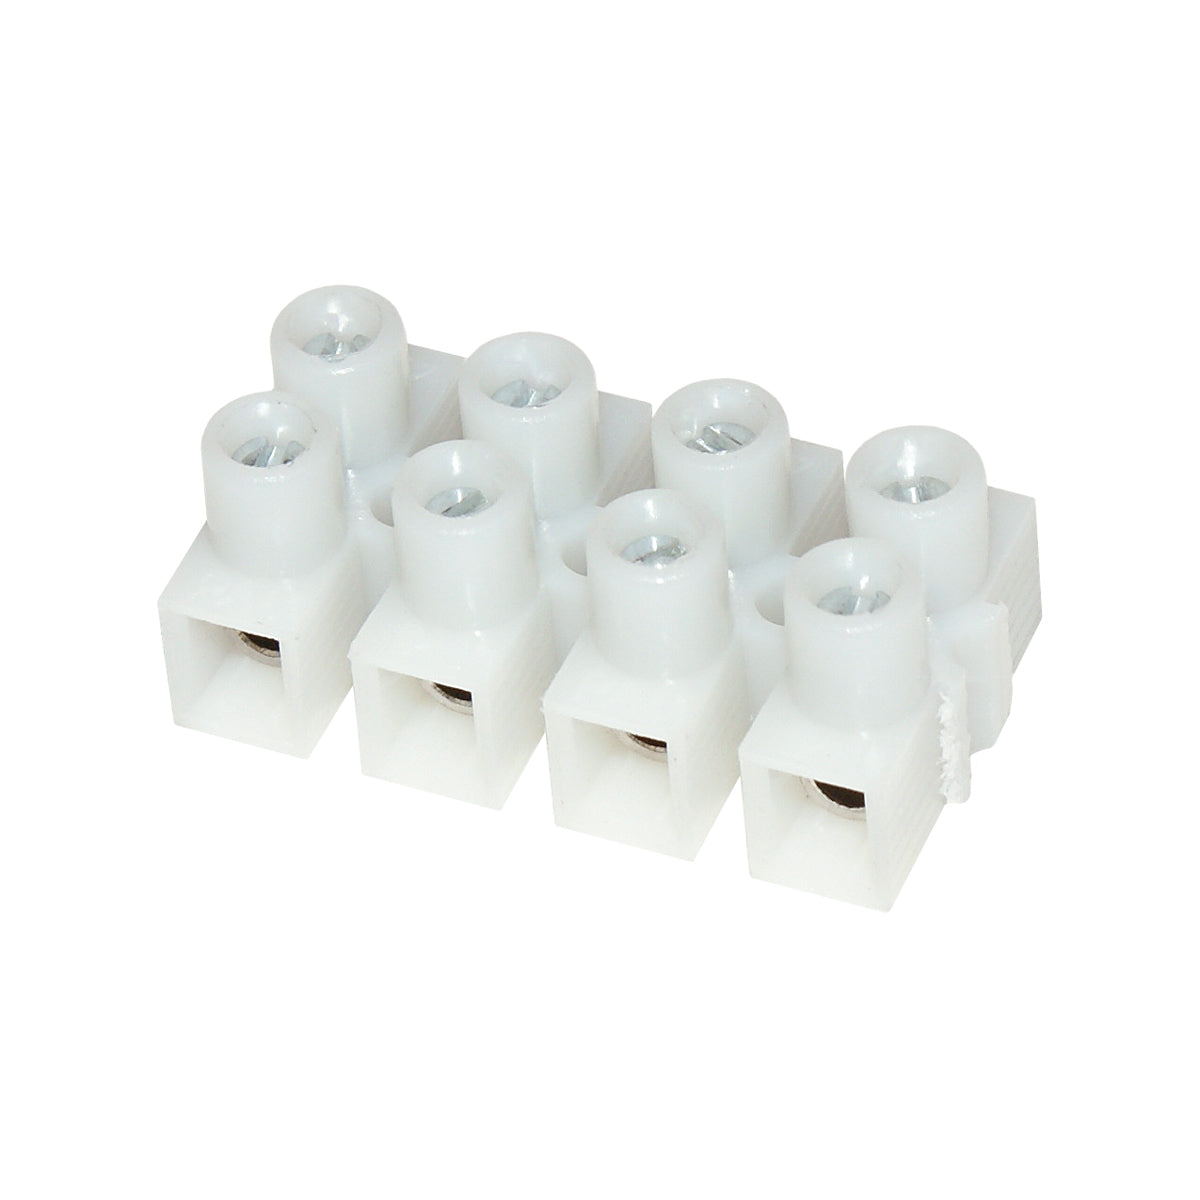
would work better. Also, I'm planning on using a terminal block like this:
To connect wires together...or maybe a Molex connector, I dunno.

Wednesday, August 13, 2014

Another "AHA" moment...

I got around to looking into my friend's fightstick. It wasn't connecting to a PS3 and couple of buttons were not functioning on the 360. I was trying to wrap my head around what sort of mod was done in it. Of course, I was doing this while re-watching the 7th season of Doctor Who before the 8th season starts up.

It was pretty much a padhack, where whoever did the mod...if that's what you wanna call it...took what seems to be a fightpad PCB (Street Fighter IV pad for 360, looks like) and splice it to a PS3 stick.

There was one PCB in there that I was not familiar with. After much searching, I now know that it's an Imp v1 made by Toodles. It came from GodlikeControls.com. I searched and searched and found a PDF file that showed how to connect both controller PCBs to it.

After much picking and prodding at the "mod" and reading about the Imp's connections, I figured out why it didn't work; seems like power and ground wasn't going to the PS3's PCB, only the 360's pad. Also, there were some loose connections in there that caused a mishap.

So needless to say, it's kind of an easy fix. I just won't be able to do it until tomorrow...and I need parts...:(

I was also gonna clean it up in there; the 2 loose PCBs were in there unsecured. That means in the heat of a fight, there's a good chance that something could short out in it.

Pics of the before and after coming up in the next several days.

Tuesday, August 12, 2014

I may be getting my first commission here soon...

Through a mutual friend on Facebook, I've got in touch with a fellow local HI guy that lives here in OR!

Got to chatting and seems like that he has a PC Engine Duo R coming in that he wants the whole shebang on: S-Video, Component, RGB, and Region mod. I've already told him were to get the 2 mod boards for the Component and Region mod, I have the parts for S-Video. Now I just need to get the RGB board from a forum member. Still waiting to hear back from that.

I think I have most, if not all, the parts to actually get this project going at a moment's notice.

...really nervous, though. But, I guess this is the only way to boost my confidence in doing mods and possibly repair work in the future.

Just need to breathe and not rush things for this one. Make it clean, and make it nice.

...still nervous...

Sunday, August 10, 2014

Insomnia sucks, so I blog...

Ugh, I don't think it's the jet lag, but the fact I took a long ass nap this afternoon. Can't sleep.

So much on the mind.

Anyway, now that I'm back from vacation, it seems I've taken on a couple more projects.

One would be a joystick mod fix. The joystick's internals have an Imp v1 in it, a chip that directs data flow from two different controllers when plugged into USB. Basically, the stick SHOULD be able to connect to a PS3 and a 360 with no problems whatsoever. This one; not so much. It doesn't detect in the PS3 and up and another button doesn't work on the 360.

Opening it up yielded a bunch of wires and floating PCBs. Looks like the Imp might have shorted out, and there's a pad hack in there, too.

I may have to take some time on this one. It was for a friend back on Maui, so this one is priority one. For payment, he gave me 2 Hori(ble) wireless sticks for the 360 and a DS3 for the PS3. These sticks, however, will get some severe hacking done to them.

I'm wanting to attempt that RGB mod for the PC Engine, but I'm not sure when my mind will allow me to do that task. I should do it soon though...really soon.

I managed to find also back on Maui an old PSX. It's the 1001 model, so it has the RCAs on the back. The CD assembly is shot (laser moves, spindle not spinning), so I'm on the hunt during my digging sessions for a PSOne, which the CD assembly should work fine for it. I also gotta de-yellow the case on it.

There's also a BIOS swap that I may be doing in the near future for my Sega CDs. I did a trade deal with a forum/FB group/friend that was in search of an RGB capable N64. I have a spare one that fit the ticket for him. This was a while back, so he was just able to burn the EPROMs for the BIOSs recently. Kinda excited about that.

Whelp. More later.